Thousands of downloadable Overlays are available online, with everything from simple weather effects to alien spaceships and apocalyptic explosions. If you’ve ever tried to use these handy stock elements, you may have been surprised to find many of the assets have a black or colored background. Don’t worry; this isn’t a mistake. You just need to know this simple trick to remove it, and we will show you how.
- Learn how to remove matte backgrounds from Overlay clips in DaVinci Resolve 19.
- Follow our step-by-step guide to remove color, black, and white backgrounds from your Overlay assets.
- Discover Motion Arrays’ massive library of special effect Overlay assets that are ready to download today.
Summary
Part 1: What are Overlays, and how can you use them in your Projects?
Overlays are video files of specific effects, looks, or animations that you can place over your video footage. Some Overlays are intended to be blended with the background image to create a seamless special effect, while others, such as video frames or icon-based stickers, are intended to stand out from the footage.
Overlays have many uses and can help you create a tone and style for your video projects. You can also use Overlays to produce effects you cannot capture in your camera, such as fire, lightning, explosions, and blood spray. Check through the Motion Array Overlay collection to see the types of assets you can add to your projects.
Part 2: How to Remove Overlay Backgrounds in DaVinci Resolve 19
There are multiple ways to key out the background of the clip to achieve a transparent background in DaVinci Resolve 19. Removing a black or white background is often referred to as Luma Key, while removing a color background is referred to as Chroma Key.
Why do Overlays have a Black or Colored background?
When Overlay animations are created, they can be exported to retain the transparent background, and if you’re lucky, your downloaded asset will have no background as soon as you place it on your Timeline.
The problem with exporting assets with a transparent background is that the files can often be massive. When you consider the various software compatibility issues with these files, it is easier for stock libraries to provide the assets with a removable background.
How to remove a Colored Green or Blue Background
First, let’s look at how to remove a blue or green screen background, which is particularly helpful if you want to film your video using a green screen.
- Place your background on the Timeline with the Overlay above it.
- In the Open FX folder, search for 3D Keyer – drag the effect to your Overlay.
- Go to the Transform tool at the bottom of the Media Viewer and click and hold on it.
- From the list, choose Open FX Overlay.
- Go to the clip Inspector and select the Effects tab.
- Click on the Color Picker + symbol and then the Media Viewer on the color you want to remove.
- Use the Despill setting to increase the amount of the color removed from the image.
- Go through the other settings and play with the properties until you’re happy with the final result.
- At the bottom of the Effects tab, you’ll find the Output options. These let you view a black-and-white Matte of your keyed image, which can help you achieve a cleaner look.
How to remove a Black or White Background
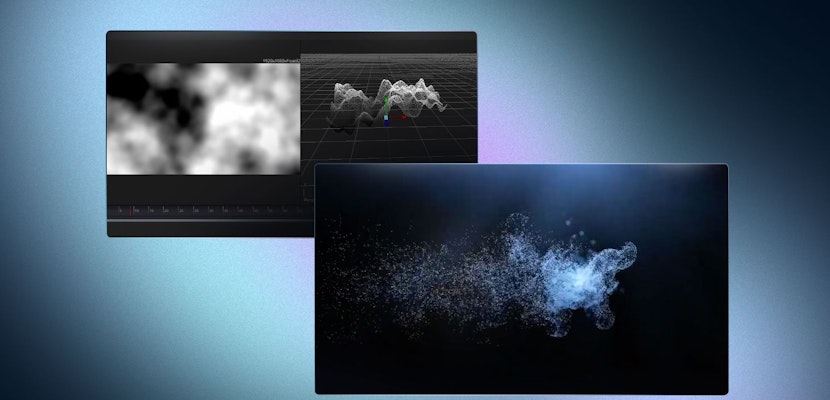
Black-and-white backgrounds are often found on special effects Overlays such as fog, smoke, or snow. Removing the black-and-white background uses exactly the same process as the colored background method; you just need a different effect.
- Stack your clips in the Timeline with the Overlay on top.
- In the Open FX panel, search for Luma Key and drag the effect to your Overlay clip.
- Ensure you’re using the Open FX Overlay tools and go to the Inspector.
- Click on the Color Picker icon, then select the background in the Media Viewer.
- In the Inspector, change the Output to Black and White.
- Play around with the settings until you’ve achieved a smooth result.
Top Tip: Under the Matte Finesse drop-down in the Inspector, click the number 2 tab. Here, you will find more options for fine-tuning the result of your Luma Key effect, including the Denoise option, which can be super helpful on intricate Overlays such as smoke and fog effects.
Part 3: Pro Tips & Troubleshooting
The process of removing matte backgrounds from Overlay clips is relatively straightforward, but the results will depend on several factors.
The Overlay Quality
Some Overlays will be provided with the original raw green screen background. For others, the creator will have already keyed out the background and replaced it with a solid color matte.
Removing the background from the pre-keyed footage is far easier, and the results are usually immediate after selecting the color. However, removing the background from raw footage can require a bit more work, as it might be a few different shades of green.
Color Correction and Grading
If you intend to create a realistic visual effect using your Overlay, it won’t be enough just to remove the background. You’ll need to color-correct both of your layers to match them in tone and exposure. You may also choose to add adjustment layers with further color-grading effects to add an overall style to your composition.
Be Creative
Overlays are a lot of fun to work with, and some fantastic options are available through Motion Arrays’ royalty-free stock library. Whether you’re looking for stickers and icons, weather elements,noise and grain, or explosions and energy pulses, we’ve got you covered.
Understanding the different methods to key out black or color backgrounds in DaVinci Resolve 19 is essential for any visual effects artist. Using Overlays unlocks a world of possibilities and allows you to play with more creative tools as you learn.
If you are looking for more on editing workflow basics in DaVinci Resolve, read our articles on how to remove objects in DaVinci Resolve, video and audio noise reduction, and how to split clips.