There are few things more off-putting and frustrating to an editor than a poorly framed shot. Whether you are a self shooter or using footage filmed by someone else, there will always be something you notice in the edit that you wish had been caught on the day. Fortunately, it is relatively straight-forward to fix a crooked horizon in Premiere Pro, and we’re going to show you how.
Summary
Part 1: How to Fix Crooked Horizon in Premiere Pro
There are several reasons that the horizon in your clip might be crooked, and it is not always because of an incompetent camera operator. Drone and gimbal footage often results in crooked horizons because of the giros used in the kit; quite often the horizon will be perfectly aligned but look off due to the shot’s limited frame.
You can’t always plan for problems that arise during filming, but knowing a few editing tricks can save you costly reshoots. If your horizon is crooked, but the camera is still; there is no movement, panning, tracking, or zooming, follow these steps.
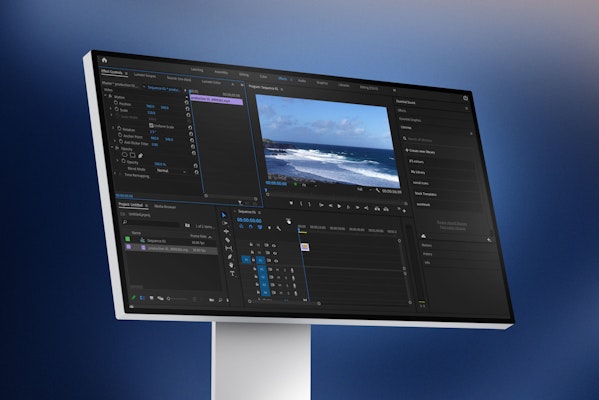
- In the timeline select your clip, and go to the Effects Control Panel.
- Increase the Scale by 10%, to begin with.
- Go to the Rotation settings and rotate your clip a degree at a time. Remember positive numbers rotate clockwise; negative numbers rotate your clip counterclockwise.
- Once you are happy with the horizon line, you can go back to the Scale settings and adjust to get as much of the picture in as possible. Be careful to ensure there are no black edges seen around the image.
Top Tip: Premiere Pro allows you to add guidelines to the screen to help line up the horizon. Go to View > Add guides.
Part 2: Fix Crooked Horizon on Rotating Footage in Premiere Pro
When your crooked footage moves, it presents a few complications; using the steps above might work for a few seconds but will quickly become crooked again and perhaps even look worse for it. Don’t worry; you can still correct the issue with a little time and patience.
- Place the Playhead on the first frame of your clip. Scale up the clip by 10% and adjust the Rotation as needed. Make sure you check the Uniform Scale box.
- Play the clip through until there is a noticeable movement that changes the horizon line. Create a keyframe just before this movement.
- Go to the end of the camera movement, create another Rotation keyframe and adjust the settings.
- Continue through the footage creating keyframes and readjusting for each change in the horizon line. This can take many keyframes depending on how much movement there is in the clip.
Part 3: How to Add Movement to Corrected Clips
For most projects, you will need to follow the steps above to fix your clips, but in some cases, you want to add movement, which will affect your corrections. For example, you may wish to add a Ken Burns effect or create a split-screen from your corrected footage and need to adjust the scale or rotation settings further.
- Follow all of the steps above to create the corrections on the clip.
- Right-click on the clip and select Nest…
- Your nested clip will contain all of your modifications, allowing you to reposition and scale your clips as you would normally.
Part 4: Tips for Creating Beautiful Horizon Shots
One of the best ways to fix crooked shots is to not film them crooked in the first place, and there are many ways to avoid this.
Wider Angles
If you are concerned that your horizon might be wonky, shoot the frame at a slightly wider angle. If you know what you would like the shot to look like, make sure you leave yourself space around the framing to allow for scaling in during the edit.
Camera Balance
Your camera will have a range of balance settings depending on the kit you are using. Even your smartphone will have a horizon guide to help you straighten shots. Try and use the tools in your camera to create the best looking horizon.
Higher Quality
Always shoot in the highest possible resolution. Most cameras will allow for shooting in 1080p, which will give you a little wiggle room before losing quality. For higher-end cameras and drones, choose to shoot in 4K. Shooting at this higher resolution might take up more memory card space, but it will give you the ability to scale up the shot a lot without losing quality.
Use a Tripod
As we’ve mentioned, the more movement in your footage, the more work you will need to fix it. Avoid clumsy and shaky camera work using a tripod where possible; you can always add a handheld camera effect in the edit once you know your shot is the best it can be.
Composition is Key
Shooting beautiful landscapes requires several considerations; what is your shot’s focus, where is the light coming from, how is the sky moving. When framing your compositions, think about what can be done in the edit and what needs to be perfect in-camera.
Fix More Than Horizons
While we’ve talked about this method being useful for fixing crooked horizons, you can also use it for straightening your shots in general. Even if you are shooting in an office, it can be easy to be slightly off, especially when you don’t have a larger monitor to review your shot. Use these steps with any wonky image to get the best looking picture you can.
Whether you are creating a promotional video or a feature film, a crooked horizon can ruin an otherwise fantastic shot. Now you know how to fix crooked horizons in Premiere Pro, you can get back to telling your story, knowing your wonky image won’t stand out.


