Have you noticed a lag when playing back your projects in Adobe Premiere Pro? Perhaps frames are being skipped, or effects and transitions aren’t working correctly. While there are other reasons for laggy playback, it’s typically linked to rendering. Rendering takes a little time, but ensuring your project is playing back at full speed and good quality is well worth doing. In this tutorial, Motion Array will show you how to render in Premiere Pro for the best results.
Summary
Part 1: Premiere Pro rendering basics
What does rendering do?
Premiere Pro works by ‘pulling’, or referencing, your assets from your folders. While this helps to keep project sizes small and manageable, it can lead to issues in the playback of your project.
When you add video clips, effects, or transitions to your timeline, Premiere Pro can play back your project for you to view. When you render video in Premiere Pro, it makes a hidden preview clip behind the scenes. When you play that clip, Premiere Pro refers to the preview version, which includes all the colors, effects, and transitions.
If you change a clip or effect, you’ll need to re-render that section so that Premiere Pro can create a new preview file. If no changes are made, the clip will continue referencing the preview file, giving you full speed and quality playback.
What do the rendering colors mean?
Premiere Pro will indicate when the project needs rendering through a series of colored bars at the top of the timeline. Let’s look at what they show you.
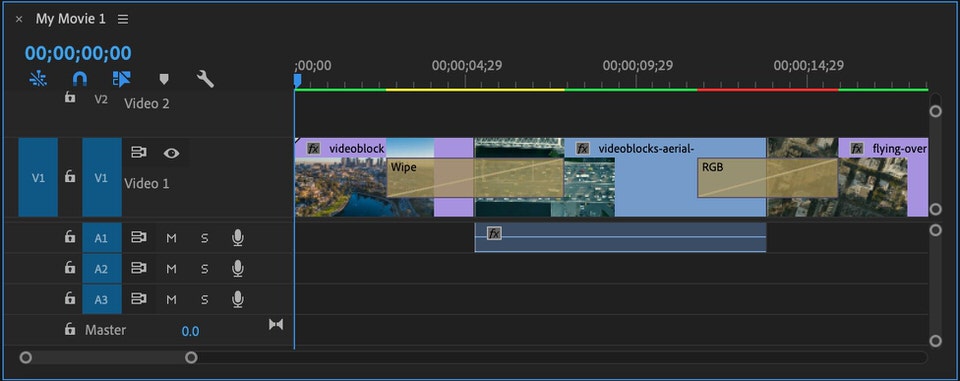
- Green: If you have a green bar at the top of your timeline, the footage has been rendered. An associated preview file is already attached to the section. You can play back your project at full speed with no interruptions.
- Yellow: The yellow bar indicates that there’s no rendered preview file associated with the clip. Instead, the clip, effect, or transition frame-by-frame will render in Premiere Pro just before it reaches that point during playback. A yellow bar will appear if the unrendered clip is simple and should play back with little to no issues.
- Red: The red bar also indicates that there’s no preview file associated with the clip. Unlike with the yellow bar, the clip will likely be heavily affected or complicated, and will cause lag during playback.
- No color: If there’s no color on the timeline, this tells you there’s no rendered preview file, but the codec of the media you’re using is simple enough to be used as a preview file. You’ll be able to play it back with no issues.
Part 2: How to render in Premiere Pro
Before you render video in Premiere Pro, you must define the work area you want to render. If you’re going to render the entire timeline, you can skip to the next step. However, we suggest that you get into the habit of regularly rendering the sections as you go. This keeps the project neat and the stress on your computer low.
Define the work area
First, you’ll define the area you want to render in Premiere Pro.
- Place your playhead at the beginning of the section and press I to mark the In point. You can also use Alt+[ (or Option+[ for Mac).
- Move the playhead to the end of the section and press O to mark the Out point. You can also use Alt+] (or Option+] for Mac).
If you follow these steps in both the timeline and the media viewer, you’ll see the selection highlighted once you’ve added in and out points. You can then drag the ends of the area to change the selection to whatever you need. You can find out more about handy keyboard shortcuts for After Effects in Motion Array’s tutorial.
Render a preview file by selecting the area
Once you’ve selected the area you wish to render, you’ll find the render options in the Sequence menu.
There are 4 different options to render in Premiere Pro.
1. Render effects in to out
Use this to render any of the red bars in your timeline. This type of render in Premiere Pro looks specifically for effects and transitions, which are the most likely cause of project lag. Once you’ve defined the work area, you can also just press Return or Enter on your keyboard.
2. Render in to out
This will render everything within your selected work area with a red or yellow bar. While this is great for general rendering, it can be time-consuming for larger projects.
3. Render selection
This option renders video in Premiere Pro when working on a specific section of the timeline. It’ll help you work faster on last-minute changes or edits.
4. Render audio
As expected, this function will only render the audio within your selected work area. This is ideal if you’re working with complex sound effects or music tracks over simple footage. By default, Premiere Pro doesn’t render audio automatically alongside the video — it has to be rendered separately. If you don’t want this default, you can turn it off. You’ll find the settings in the Preferences window.
Part 3: Pro tips and troubleshooting
Why is my project taking so long to render in Premiere Pro?
There are several reasons why your project might take a while to render. Your device may be struggling or overheating. It could also be the project size, as large projects need a lot of resources to render in Premiere Pro. If your video starts rendering fast, but slows down, it’s most likely due to the Render Progress bar.
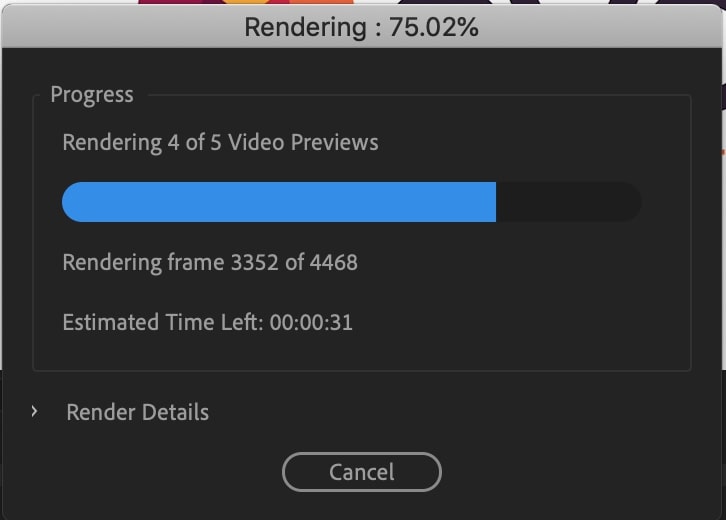
When you render, the progress bar displays percentages to show progress. These percentages work on the number of clips being rendered in the work area, not on their length as you’d think. If there are 4 clips in your timeline, each one will be 25% of the project, regardless of how long that clip is.
So, if your first clip is 5 seconds long and the second is 20 seconds, both will be shown as 25% of the progress bar. In other words, the first quarter will take less time than the second.
Tips for fast rendering
- For the fastest rendering, make sure you have a strong GPU and enough RAM. Here are some suggested specs for video editing laptops from Intel.
- Store your more significant editing projects on an SSD. This will help increase the rendering speed in Premiere Pro.
- You can cancel rendering at any time from the progress bar. Rendering is completed in blocks, so you’ll retain any preview files that were created before you canceled the render.
- Rendering your project regularly can save vast amounts of time in the exporting process.
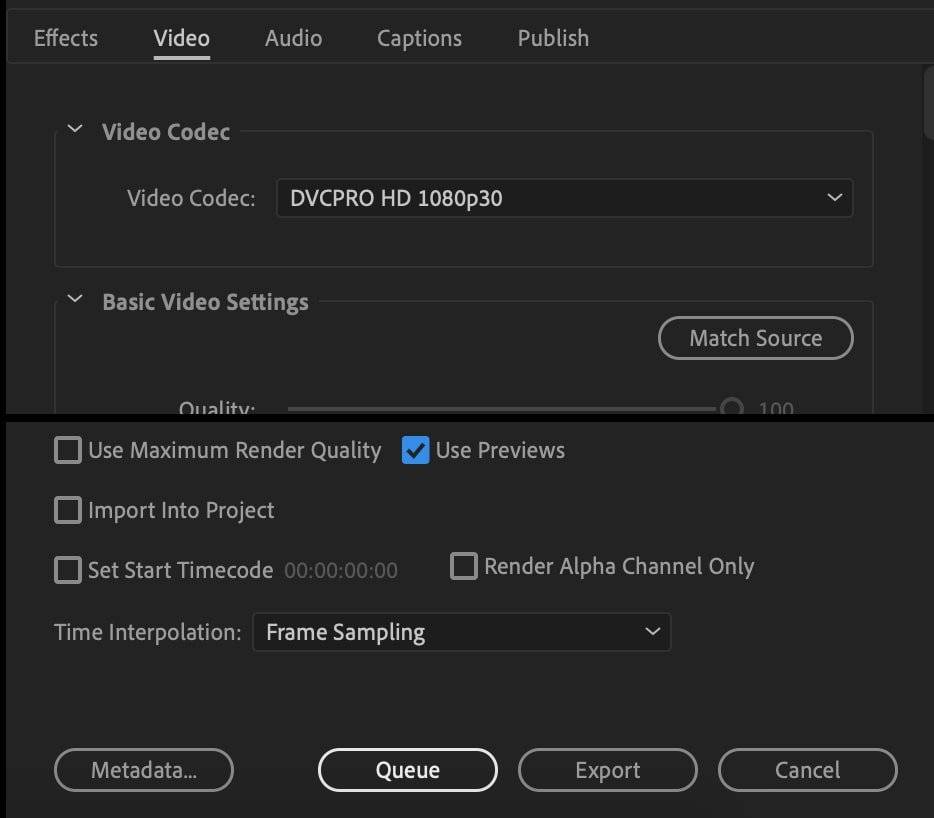
- When you export your project, Premiere Pro renders and then compresses it. If your project is rendered, you can save time in the export by selecting the Use Previews checkbox. Premiere Pro will then use the preview files in the compression rather than rendering from scratch.
Rendering in Premiere Pro can seem like an annoying inconvenience. After all, it cuts into your editing time! However, when done regularly and correctly, it can save you a lot of time and frustration.
Just as you regularly save your project, you should get into the habit of rendering little and often. You can always answer some emails or grab a coffee while you wait. It’s also a good excuse to care for your eyes and take a screen break. When you’re ready to export your project, this handy tutorial will help.